


How to Install VirtualBox on Windows: A Step-by-Step Guide
VirtualBox is a powerful open-source tool that allows you to create virtual machines on your computer. It enables users to run multiple operating systems simultaneously on the same hardware, making it an essential tool for developers, testers, and IT professionals. This guide walks you through the process of downloading and installing VirtualBox on a Windows system.
What is a Virtual Machine?
A virtual machine (VM) is a software-based environment that simulates the hardware of a physical computer. It abstracts components like the CPU, disk drives, memory, and network interface card (NIC) into a flexible platform that supports different operating systems and execution environments. VirtualBox is one such tool that enables users to create and manage VMs for a variety of purposes, such as:
Running multiple operating systems simultaneously.
Testing software in isolated environments.
Experimenting with different OS configurations without affecting the host machine.
What is Virtualisation?
Virtualisation is a technology that creates virtual versions of physical hardware, software, storage, and networks. It allows a single physical machine to host multiple virtual environments, each functioning as an independent system. By abstracting hardware resources, virtualisation enables running different operating systems or applications simultaneously on the same physical infrastructure. This not only maximises resource utilisation but also enhances flexibility and scalability, making it a cornerstone of modern IT infrastructure.
Virtualisation is widely used in data centres, cloud computing, and software testing. It supports concepts like virtual machines (VMs) and containers, which provide isolated environments for deploying and managing applications. For businesses, virtualisation reduces costs by consolidating servers and lowering energy consumption. It also simplifies maintenance, as virtual systems can be easily cloned, backed up, or migrated across physical hosts. Whether it's enabling seamless development workflows or driving efficiency in large-scale operations, virtualisation plays a critical role in today’s digital landscape.
Lets Start our cyber security journey with VirtualBox.
Step 1: Download VirtualBox

Visit the official VirtualBox website at virtualbox.org.
Navigate to the Downloads section.
Select the latest version compatible with Windows.
Download the installation package to your system.
Step 2: Begin Installation

Locate the downloaded file and double-click to start the installation process.
Follow the on-screen instructions provided by the VirtualBox Setup Wizard.
Getting Started
- Upon launching the setup, you’ll see the welcome screen. Click Next to proceed.
Step 3: Select Installation Location

Choose the folder where you want VirtualBox to be installed.
By default, it installs in the
C:\Program Files\Oracle\VirtualBoxdirectory. If you wish to change this location, click Browse and select a different folder.
Step 4: Customize Shortcuts and Features

During this step, you can choose which shortcuts and application entries to create:
Start Menu entries
Desktop shortcuts
Quick Launch shortcuts
Check or uncheck the options based on your preference.
Step 5: Ready to Install

Once all configurations are set, the setup wizard will display a summary of your choices.
Click Install to begin the installation process.
Step 6: Installing Files and Certificates
The installation will now copy files and packages to your system.
You may be prompted to install VirtualBox drivers and certificates during this process. Ensure you click Install or Allow for all prompts to avoid interruptions.
Step 7: Complete Installation

After all files are installed, you’ll see a completion screen.
Click Finish to exit the setup wizard.
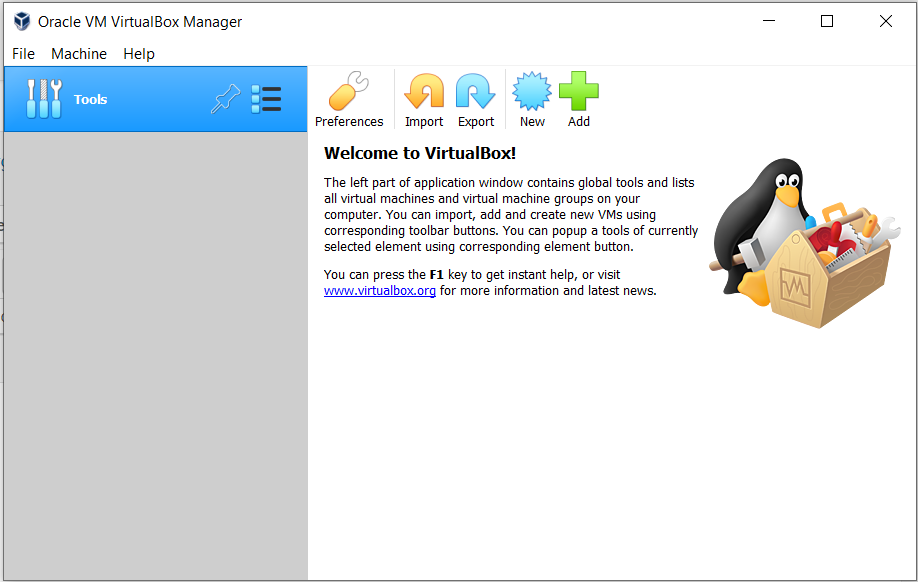
Step 8: Launch VirtualBox
Open VirtualBox from the Start Menu or Desktop shortcut.
The interface will look as shown below:
Additional Tips and Recommendations
Install Extension Packs:
Extension packs enhance the functionality of VirtualBox by providing additional features like USB 2.0/3.0 support, disk encryption, and remote desktop capabilities.
You can download the extension pack from the VirtualBox website and install it via the File > Preferences > Extensions menu in the VirtualBox interface.
Create a New Virtual Machine:
To create your first virtual machine, click the New button in VirtualBox.
Follow the prompts to configure the operating system, memory allocation, and storage options.
Backup Your VMs:
- Always keep a backup of your virtual machines, especially if they contain important data. You can export them as
.ovafiles for easy restoration.
- Always keep a backup of your virtual machines, especially if they contain important data. You can export them as
Enable Virtualization in BIOS:
- Ensure virtualization is enabled in your system’s BIOS/UEFI settings to improve the performance of your virtual machines.
Keep VirtualBox Updated:
- Regularly update VirtualBox to access new features, improved performance, and security patches.
Conclusion
Installing VirtualBox on Windows is a straightforward process that opens up endless possibilities for running multiple operating systems, testing software, or learning about new technologies. By following this guide, you’ll be able to set up VirtualBox and start creating virtual machines in no time.
For advanced configurations, explore VirtualBox’s detailed documentation available on their official website. Happy virtualizing!